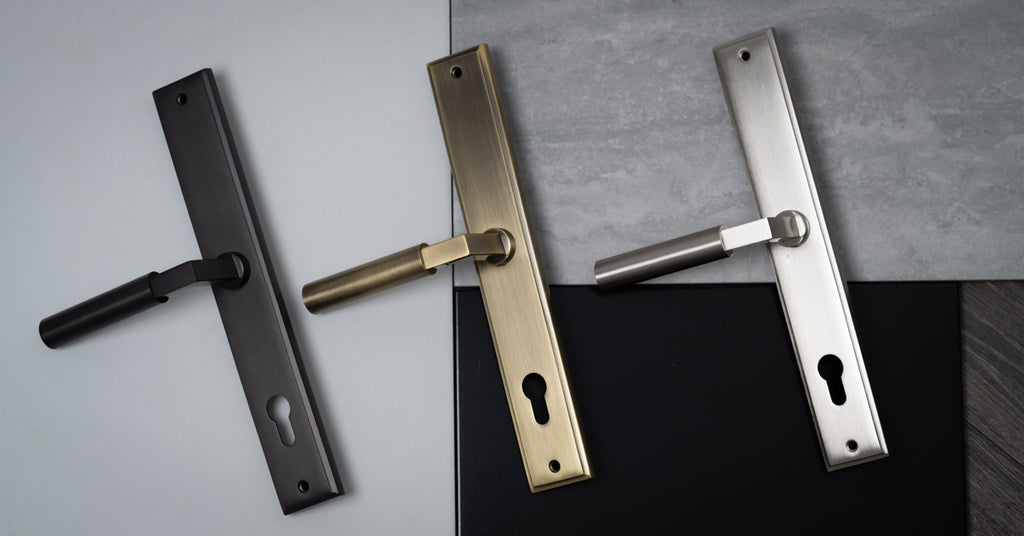
How to Fit a Multipoint Door Handle
.png?v=1695128771034&options=c_fill,w_2260,h_1280)
.png?v=1695128781549&options=c_fill,w_750,h_700)
Installation Guide: Multipoint Door Handle
Table of Contents
Materials and Tools Needed
Steps to Install the Multipoint Door Handle
-
Preparation:
- Ensure that the new handle is the correct size and type for your door. It should match the centre of the handle to the centre of the keyhole, this can also be known as the PZ measurement.
- Remove any obstacles or items around the door area to give yourself adequate space to work.
- We recommend blocking the latch on the door mechanism to avoid the door accidentally shutting while you are working on the door. This can be done with either super glue or tape or simply propping the door to stop it from moving.
-
Remove the Old Handle:
- Using the screwdriver, locate and remove the screws on the interior side of the door that holds the handle in place. These are usually located above and below the handle shaft. (This should be done with a screwdriver to avoid damaging the multipoint lock.)
- There may be a grub screw located under the handle which keeps the whole handle attached to the mortice bar, this can simply unscrew using a m5 compatible Allen key.
- Once the screws are removed, gently pull both the interior and exterior handles away from the door.
- There will be a mortice bar connecting the two handles together, please keep this in case there are any problems with the new mortice bar.

-
Check the Holes:
- If your door already has pre-drilled holes for a bolt-through connection, you can proceed to the next step.
- If not, you'll need to mark and drill the holes. Use the new handle as a template: position it on the door where it will be installed and mark the positions for the bolt-through screws.
- Carefully drill the holes using the appropriate-sized drill bit, only a slightly larger drill bit will be appropriate as it needs to be able to spin freely to reach the other handle and pull them tightly together.
-
Install the New Handle:
- Position the exterior part of the handle onto the door, aligning the screw holes.
- While holding the exterior handle in place, align the interior handle on the other side, ensuring that the screw holes match up.
- Begin by hand-threading the bolt-through screws to ensure they are aligned correctly.
- Tighten the screws using the screwdriver. Make sure not to overtighten, as this could damage the door or the handle.
-
Test the Handle:
- Before completing the installation, it's essential to test the handle. Turn it to ensure it moves smoothly and doesn't catch.
- Lock and unlock the door using the key to make sure the mechanism works as it should.
-
Final Adjustments:
- If the handle is stiff or doesn't align correctly, you may need to adjust the positioning or check if the screws are overtightened.
- Some handles come with gaskets or washers. Ensure these are positioned correctly to prevent any gaps or misalignments.
- Finishing Up:
- Once you're satisfied with the installation, make sure the work area is clean and all tools are put away.
Tips
- Always measure twice before making permanent changes.
- Consult with a professional if unsure about installation.
- Use a pilot hole when drilling.